I’m currently working with BAVC on a project called qctools which is developing software to analyze the results of analog audiovisual digitization efforts.
One challenge is producing a software-based waveform display that accurately depicts the luminosity data of digital video. A waveform monitor is useful when digitizing video to ensure that the brightness and contrast of the video signal are set properly before digitizing the video and if not then the waveform allows a means of measuring luminosity so that adjustments could be made with a signal processors such those often available on a timebase corrector.
While working with a draft waveform display that I had arranged via ffmpeg’s histogram filter I realized that my initial presentation was inaccurate. In order to start testing I needed a video that showed all possible shades of gray that an 8 bit video might have (two to the power of 8 is 256). I was then going to use this video as a control to put through various other software- and hardware-based waveform displays to make some measurements, but producing an accurate video of the 256 shades was difficult.
I eventually figured out of way to write values in hexadecimal from 0x00 to 0xFF and then insert a 0x80 as every other byte and then copied that raw data into a quicktime container as raw uyvy422 video (2vuy) to make this result.
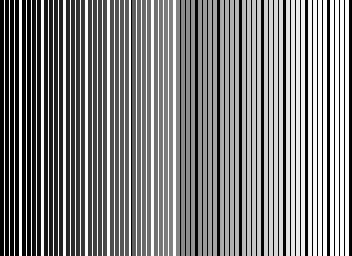
This video is a 1 frame long 8 bit 4:2:2 uncompressed video that contains the absolute darkest and lightest pixels possible in an 8 bit video all possible 8 bit graytones in between separated by thick white or black stripes every 16 shades and thin white or black stripes every 4 shades.
In a waveform monitor such as Final Cut’s waveform display below, the result should be a diagonal line with dotted lines at the top and bottom that show the highest and lowest shades of grey allowed.
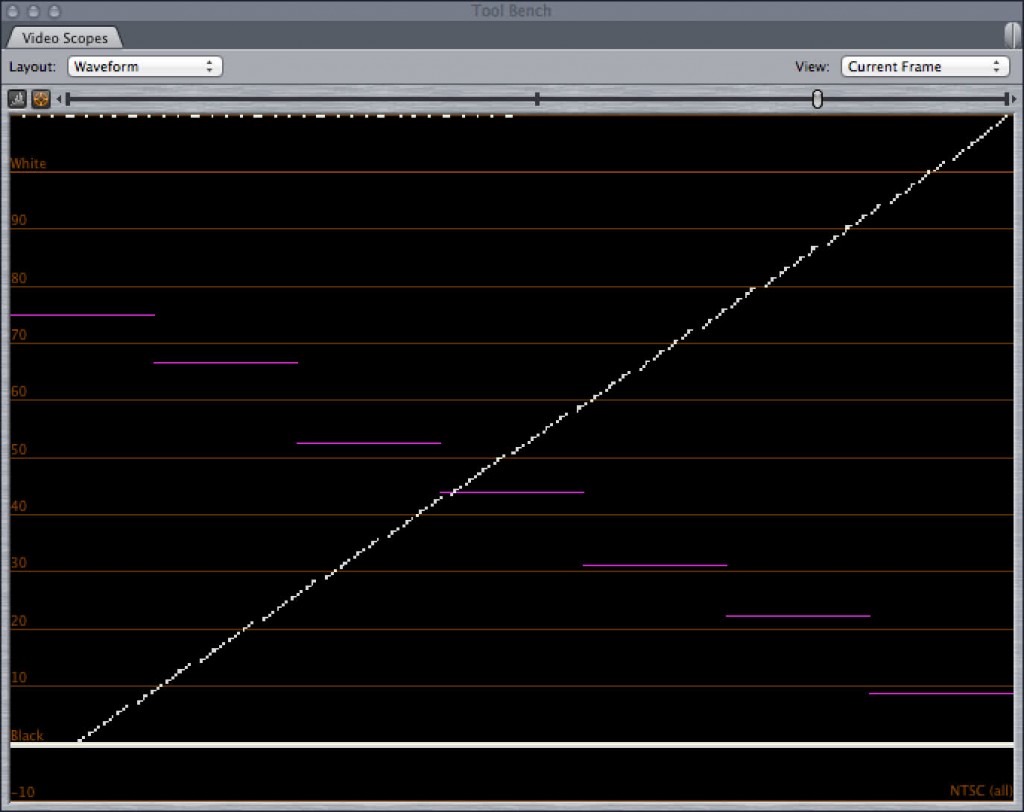
Putting the 256_shades file in Final Cut’s waveform shows that Final Cut does not plot values from 0-7.5 IRE but does plot the rest all the way up to the 110 IRE limit.
However, Final Cut’s waveform display does not plot the lowest graytone values. Columns from 1-16 are not display. By divided the graytone shade number by approximately 2.33 you get the IRE value. So from 0-7.5 IRE is not plotted in this display but all crushed together at 7.5 IRE.
And here is the same video displayed through ffmpeg’s histogram filter in waveform mode. A few other filtering options are added to the display to give guidelines to show values that are outside of broadcast range, from 0-7.5 IRE in blue and 100-110 IRE in red.
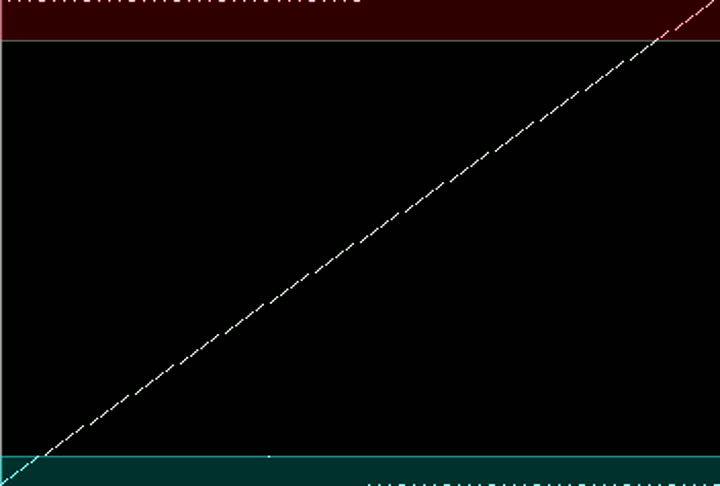
256_shades file in ffmpeg’s histogram filter showing the full range of 0-110 IRE (boundary lines mark broadcast range at 7.5 and 100 IRE)
In qctools all 256 shades of gray are plotted appropriately, showing a diagonal line going from one corner of the image to another, with the white and black spacing columns show as a half-line of dots and dashes at the very first and very last night of video.
Follow the qctools project at http://bavc.org/qctools for more information.

Quite the salacious post Dave. One point of clarification here. The 7.5 ire cutoff that you are seeing in Final Cut Pro is not a limitation of FCP. This is tied to a foundational standard for digital video – BT.601 which is THE definitive digital video standard responsible for 4:2:2 YCbCr video as we know it today. BT.601 states the following for 8-bit video:
“Given that the luminance signal is to occupy only 220 levels, to provide working margins, and that black is to be at level 16, the decimal value of the luminance signal, Y-, prior to quantization, is: Y- = 219 (EY¢ ) + 16
and the corresponding level number after quantization is the nearest integer value.”
and
“Luminance Signal – 220 quantization levels with the black level corresponding to level 16 and the peak
white level corresponding to level 235. The signal level may occasionally excurse
beyond level 235”
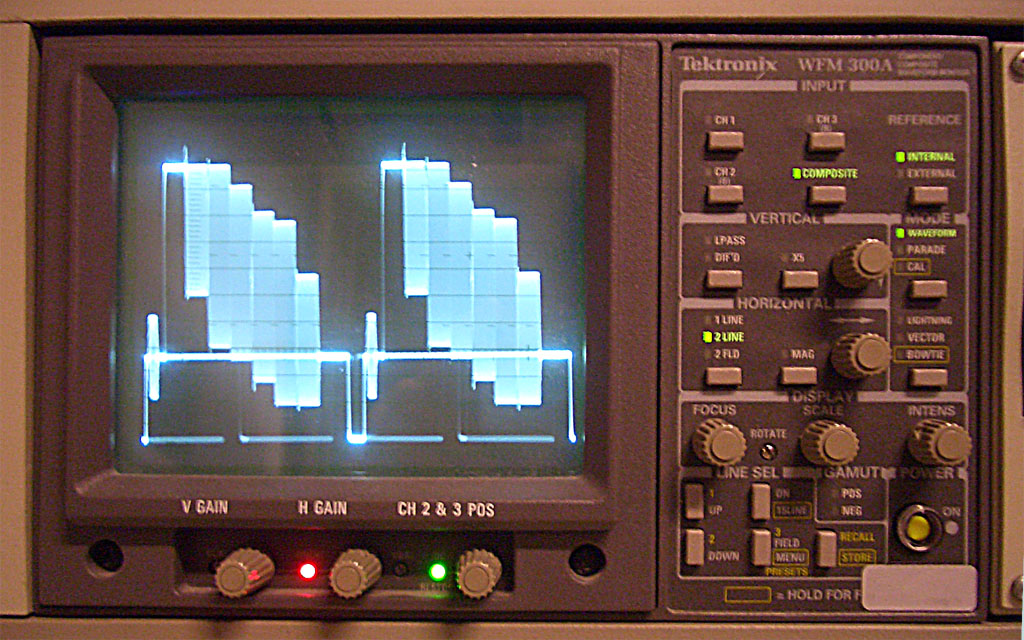
BT.601 brought together a digital video standard for 525 (NTSC) and 625 (PAL) line systems. In NTSC 16 = 7.5 IRE (aka video setup in analog video marked with a dashed line in an NTSC analog waveform monitor) and in PAL 16 = 0 IRE (video setup for PAL) based on their respective standards. Hardware and software systems will have preferences that allow you to identify the recording standard you are using in order to manage the signal properly, including the display of the scopes. In the example you show, you are showing a Final Cut Pro NTSC session, where 16 is mapped to 7.5 IRE and everything below 16 is not part of the video signal. If you were in a PAL session it would map 16 to 0 IRE. Under any circumstance though, any digital video will place black at 16. Therefore the source sample you made represents a video signal that wouldn’t exist under any normal circumstance. In fact it may even throw off the signal management performed by video systems. For instance, when outputting a digital video signal to an analog NTSC output, 16 would be mapped to 7.5 IRE. Or in 8-bit YUV to RGB conversions 16 – 235 is mapped to 0 – 255. I’m not sure how the signal you generated would be handled in either of these cases. It may just cut off everything below 16 and act as it always does, or it may cause some issues.
Anyway, your point and demonstration is still a good and valuable one, but it’s worth noting the appropriate history and context here and going back to video fundamentals to properly interpret things. There is a good reason that the things you have found are the way they are. However, this doesn’t take away from your main message here, which I interpret to be “as caretakers of video signals we want tools that show us EVERYTHING that’s going on and these tools are often not found in the traditional video toolbox”.
Thanks Dave —
-Chris
Dave and Chris,
I wanted a leave a note here and say that when the file was tested on my own system, the native file specs are actually PAL (25fps), at a 352×256 raster. When forcing this file into either a PAL or NTSC timeline in Final Cut 7, the resulting waveforms are quite different from Dave’s screen grab – specifically, the grey ramp-like incline gets wider, and the black and white transients are rendered much more visible. The file viewed as an NTSC waveform in Final Cut clips everything below 16, as Chris has already mentioned.
Mind the pedestal!
Erik
Based on the replies, I made two new samples. This time they are made directly to 720×486 at 30000/1001 fps (NTSC) and 720×576 at 25 fps (PAL). Each sample contains all 256 possible Y values at least twice that are separated by stripes at every 4 and 16 Y values. The separators at every 16 shades contain the equivalents of 0, 7.5, 100, and 110 IRE. The separators at every 4 shades as well the 48 columns in the middle are at the middle Y value, 0x80. The image is in uyvy422 but contains only 0x80 for U and V data.
256 Gray Test Pattern – NTSC
256 Gray Test Pattern – PAL
With these samples I was about to get the lower Y values to plot in Final Cut so that the 0-7.5 IRE range is plotted, as seen in this screengrab. Although the Y values increment at a steady rate, for some reason the Final Cut waveform plots the 0-7.5 IRE values at the bottom at a steeper slope than the 7.5-110 range.
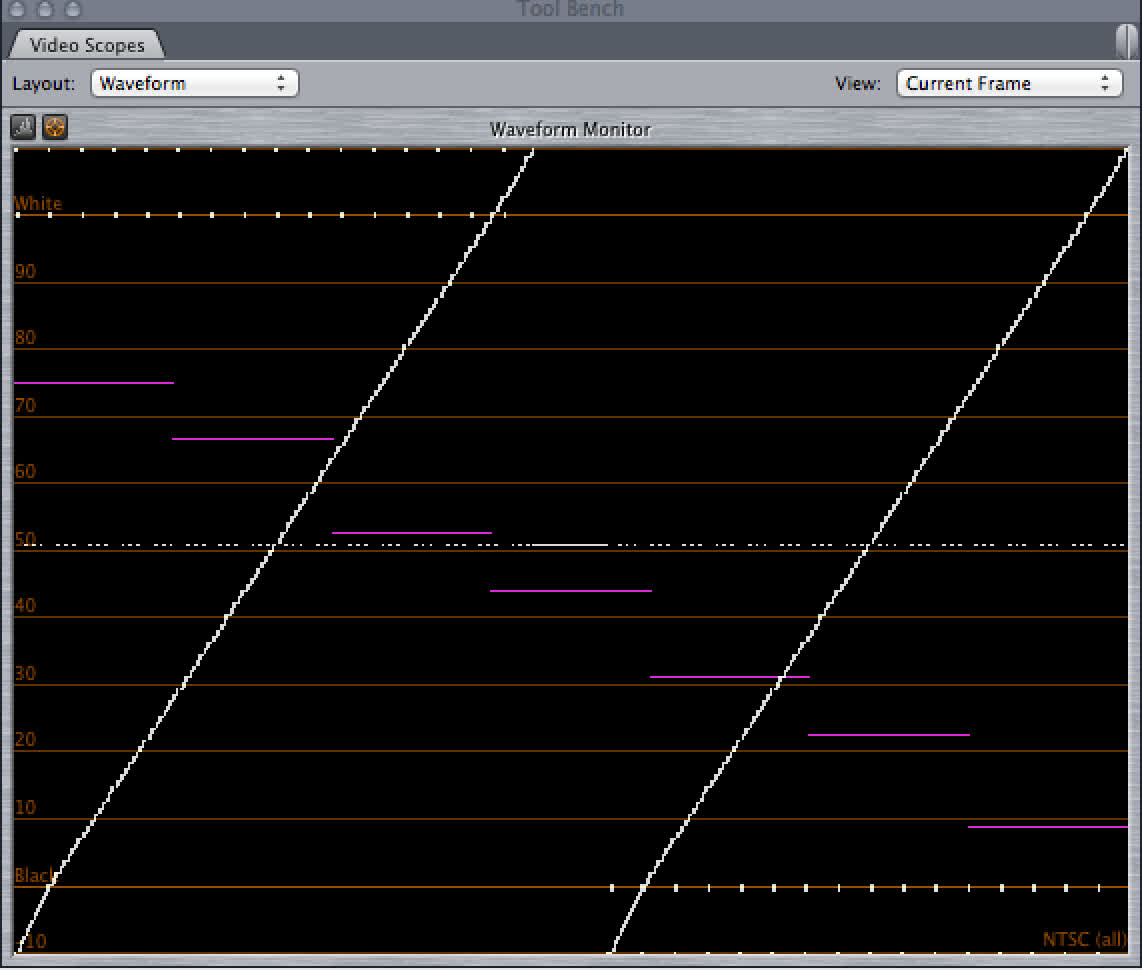 Final Cut waveform showing a sample file that contains vertical stripes of all 256 values for Y.
However if I then re-size the waveform window, the waveform is redrawn at the new size, but the lower Y values are all crushed to 7.5 IRE.
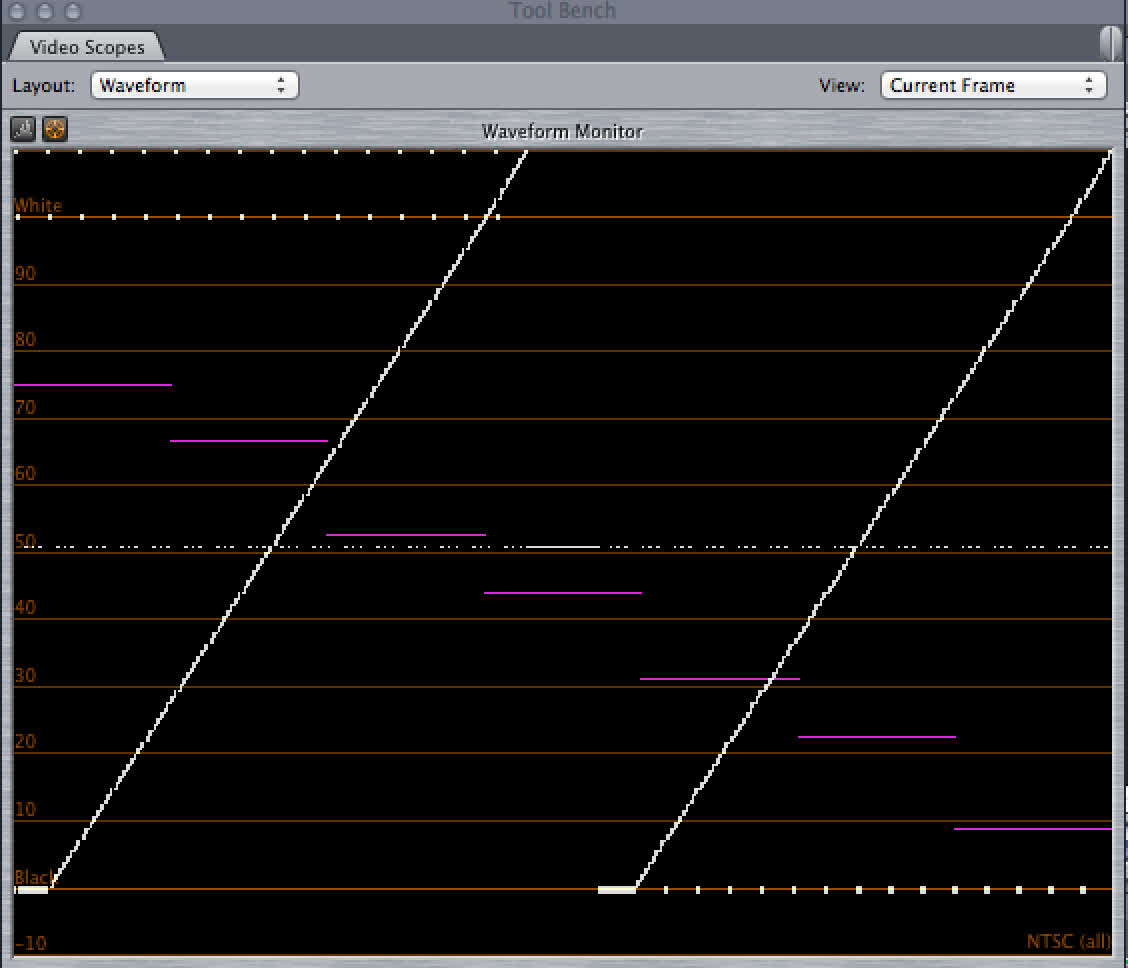 Final Cut waveform display is resize and the redrawn waveform cuts off 0-7.5 IRE.
When advancing to a new frame the 0-7.5 IRE range is redrawn, so I think the issue with my first sample is that it was not already scaled to NTSC or PAL frame sizes and that the internal re-scaling process clipped some of the extreme values.